Surfshark Launches Free Privacy-Protecting DNS Service

A Simple Step Toward Better Online Privacy Without Subscription Costs
- Surfshark has released a free public DNS service with a strict no-logs policy, offering enhanced privacy for internet users
- The service works by translating website names into IP addresses without tracking user browsing activity
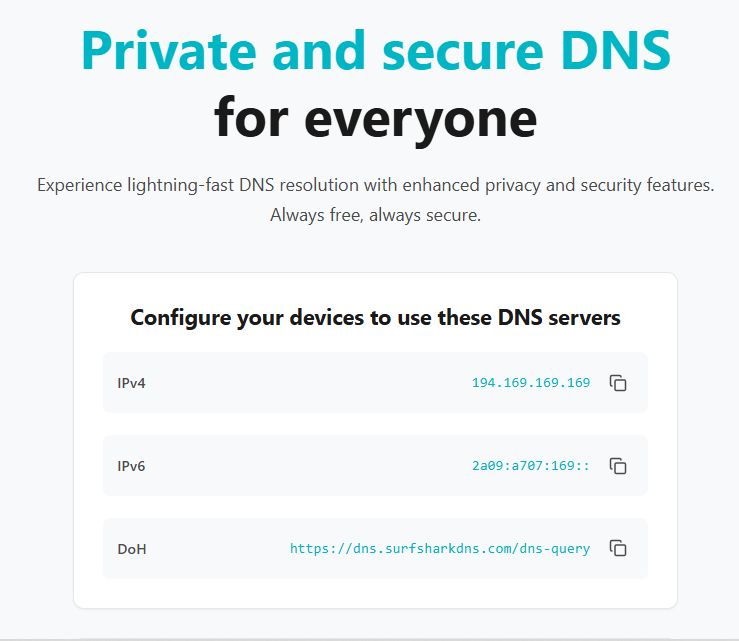
- Users can implement Surfshark DNS on various devices by manually changing DNS settings to 194.169.169.169 (IPv4) and 2a09:a707:169:: (IPv6)
Surfshark has launched a free public DNS service focused on privacy protection that doesn’t log user browsing data. This new offering allows both individuals and organizations to enhance their online privacy without subscription costs.
The service functions as a translator between human-readable website addresses and numerical IP addresses computers require, but unlike ISP-provided DNS servers, it doesn’t track user activity.
How the Privacy-Focused DNS Works
When users type website names into browsers, DNS servers convert these names into IP addresses. Traditionally, this process creates a digital trail visible to Internet Service Providers.
Surfshark’s alternative protects privacy by not recording these lookups. “Our DNS service is designed with both stable connectivity and privacy in mind, offering a robust network that doesn’t store or track personal data, giving users a private, seamless browsing experience,” states a company representative.
The company has promised an independent audit to verify its no-logging claims.

Implementation Across Devices
Users can configure the DNS service on various platforms including Windows, Mac, iOS, and Android devices.
For Windows computers, users need to access the Control Panel, select Network and Internet, click Network and Sharing Center, then Change adapter settings.
For Windows computers:
- Go to Control Panel → Network and Internet → Network and Sharing Center
- Click “Change adapter settings” on the left
- Right-click on your network connection and select Properties
- Select “Internet Protocol Version 4 (TCP/IPv4)” and click Properties
- Choose “Use the following DNS server addresses”
- Enter 194.169.169.169 as the IPv4 address
- Click OK to save changes
For Mac users:
- Click the Apple menu and select System Settings
- Click on Network
- Choose your active network connection and click Details
- Go to the DNS tab
- Click the + button to add 194.169.169.169 (IPv4) and 2a09:a707:169:: (IPv6)
- Click OK and Apply to save changes
On iPhones and iPads:
- Open Settings and tap Wi-Fi
- Tap the information icon (i) next to your connected network
- Scroll to Configure DNS and tap it
- Switch to Manual
- Remove existing servers (tap the red circle next to them)
- Tap “Add Server” and enter 194.169.169.169
- Tap Save to apply changes
For Router configuration (affects all connected devices):
- Open a web browser and enter your router’s IP address (typically 192.168.1.1)
- Enter admin username and password
- Find DNS settings under “Internet” or “WAN” settings
- Input 194.169.169.169 (IPv4) and 2a09:a707:169:: (IPv6)
- Save changes and restart the router if necessary
While changing DNS settings can bypass basic website restrictions, users seeking comprehensive privacy protection might consider Surfshark’s VPN service which offers additional security through data encryption and IP address masking.
The free DNS service represents part of Surfshark’s broader privacy-focused product lineup, making basic online privacy protection accessible to anyone regardless of technical expertise or budget constraints.
