
ArduPilot: The Complete Guide to Open Source Autopilot Systems
What is ArduPilot? 🤔
Have you ever wondered how drones can fly by themselves? Or how boats and cars can drive without anyone controlling them? The answer is ArduPilot!
ArduPilot is a free, open-source autopilot system that can control almost any vehicle. Whether you have a drone, a boat, a car, or even a submarine, ArduPilot can make it move on its own. It’s like giving your vehicle a brain that can think and make decisions!
Why do people love ArduPilot? It’s 100% free to use, works with many different vehicles, and has a huge community of helpers. You can use it for fun hobby projects or serious work tasks.
“But isn’t it hard to set up something so powerful?”
Many people worry about this, but don’t worry! This guide will break everything down into simple steps that anyone can follow.
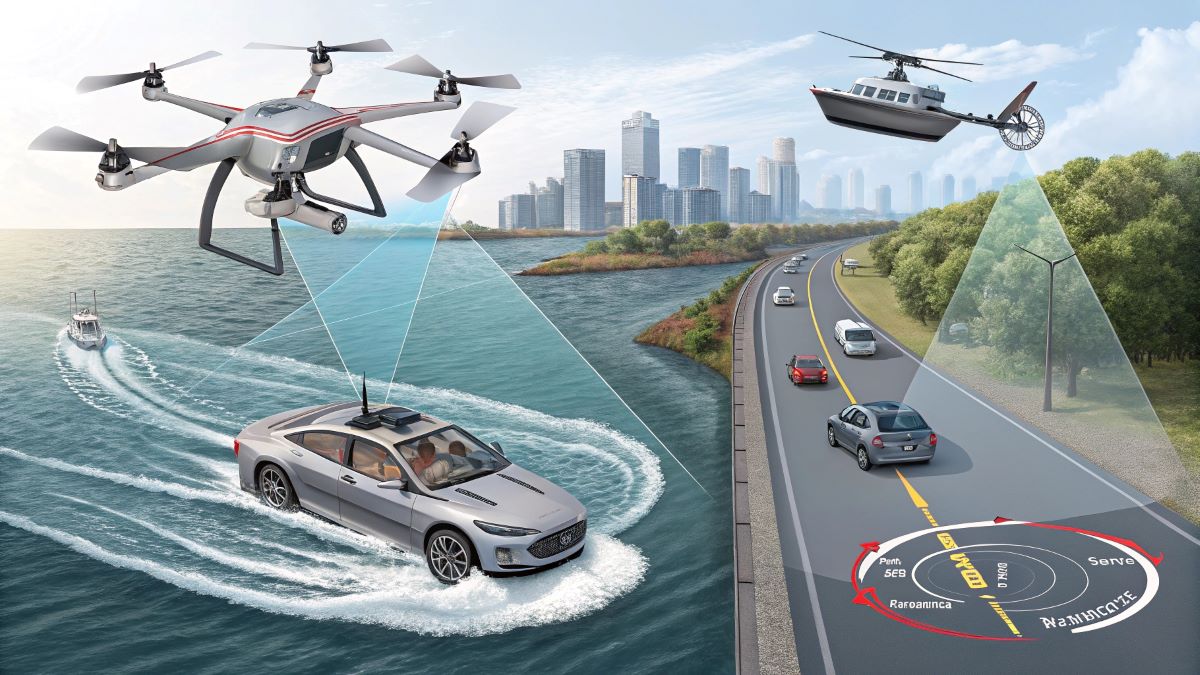
ArduPilot System Overview
Why Choose ArduPilot? 👍
ArduPilot stands out from other autopilot systems for many good reasons:
- It’s completely free – unlike other systems that can cost hundreds of dollars
- It works with many vehicles – drones, planes, boats, cars, and more
- It has tons of features – from basic flying to complex missions
- A big community supports it – thousands of people can help you
- It keeps getting better – new updates come out all the time
ArduPilot also works with many different controller boards, including Pixhawk, Cube, and many others. This means you can pick the hardware that fits your needs and budget.
What Can You Do With ArduPilot? 🚁
The list of things you can do with ArduPilot is huge! Here are just a few ideas:
Photography
Take amazing aerial photos and videos of landscapes, events, or properties.
Mapping
Create detailed maps of land areas for surveys or planning.
Inspection
Check hard-to-reach places like roofs, towers, or power lines.
Delivery
Transport small packages or items from one place to another.
Search & Rescue
Help find lost people or animals with aerial views.
Agriculture
Monitor crops, analyze field conditions, or even spray plants.
Whatever your goal is, ArduPilot can help you reach it. It can be as simple or as complex as you want it to be.
Getting Started: What You’ll Need 🛒
Before you can start using ArduPilot, you’ll need some equipment. Don’t worry – we’ll keep it simple!
Basic Equipment List:
- A controller board – like Pixhawk, Cube, or another ArduPilot-compatible board
- A vehicle frame – choose based on what you want to build (drone, plane, boat, etc.)
- Motors and electronic speed controllers (ESCs) – to make your vehicle move
- A battery – to power everything
- A radio controller – so you can take manual control when needed
- A computer – to set up and configure your vehicle
- Ground Control Station software – Mission Planner is the most popular choice
“What if I don’t want to build my own vehicle?”
That’s okay! You can buy ready-to-fly drones that work with ArduPilot, or you can convert existing vehicles by adding a controller board.
ArduPilot Setup Process Workflow
Step 1: Install Ground Control Software
Download and install Mission Planner on your computer
Step 2: Connect Your Controller Board
Use USB to connect your Pixhawk or other controller to your computer
Step 3: Install the Right Firmware
Choose Copter, Plane, or Rover firmware based on your vehicle type
Step 4: Mount the Controller
Secure the controller board to your vehicle frame
Step 5: Connect All Components
Wire up motors, receiver, battery, and other accessories
Step 6: Configure and Calibrate
Calibrate sensors and set up essential settings
Step 7: First Flight or Drive
Test your vehicle in a safe, open area
Setting Up ArduPilot: Step by Step 🔧
Let’s break down the setup process into clear, easy steps:
Step 1: Install Ground Control Software
The first thing you need to do is install Mission Planner on your computer. Mission Planner is free software that lets you talk to your ArduPilot controller.
- Go to the ArduPilot website (ardupilot.org)
- Find the Mission Planner download link
- Download and install it like any other program
- Open Mission Planner when it’s installed
Mission Planner might look a bit complex at first, but don’t worry! We’ll cover just what you need to know.
Step 2: Connect Your Controller Board
Now you need to connect your controller board (like Pixhawk) to your computer:
- Use the USB cable that came with your controller
- Plug one end into the controller and the other into your computer
- Wait for your computer to recognize the device
- In Mission Planner, select the correct COM port from the dropdown menu in the top right
- Set the baud rate to 115200
- Click “Connect”
If everything works, Mission Planner will show that it’s connected to your controller!
Step 3: Install the Right Firmware
Your controller board needs the right software (called firmware) for the type of vehicle you’re building:
- In Mission Planner, go to the “Setup” tab
- Click on “Install Firmware”
- Choose your vehicle type (Copter for drones, Plane for airplanes, Rover for cars/boats)
- Follow the on-screen instructions
- Wait for the firmware to install (this might take a few minutes)
The firmware is what tells your controller how to fly or drive your specific type of vehicle.
Step 4: Mount the Controller to Your Vehicle
How you mount your controller depends on your vehicle type, but there are some basic rules:
- Place the controller near the center of your vehicle
- Make sure the arrow on the controller points toward the front
- Use the mounting foam or vibration dampeners that came with your controller
- Secure it well so it won’t move during operation
Tip: Good mounting is important! If your controller moves around too much, it won’t be able to control your vehicle properly.
Step 5: Connect All the Components
Now you need to connect everything to your controller board:
- Motors/ESCs – connect to the main outputs
- Radio receiver – connect to the RC input
- Battery – connect through a power module
- GPS (if you have one) – connect to the GPS port
- Other accessories – connect to the appropriate ports
Make sure to check the ArduPilot documentation for your specific controller board to get the right connections.
Basic Configuration: Making It Work Right ⚙️
Once everything is connected, you need to configure ArduPilot:
Calibrate Your Sensors
Your controller has several sensors that need to be calibrated:
Accelerometer
Tells the controller which way is up
Compass
Tells the controller which way is north
Radio
Sets up your remote control
ESCs
Makes sure motors respond correctly
Mission Planner will walk you through each of these calibrations step by step.
“Do I really need to do all these calibrations?”
Yes! Skipping calibrations is like trying to use a compass that points in the wrong direction. Your vehicle won’t work properly without them.
Set Up Flight Modes
Flight modes control how your vehicle behaves:
- In Mission Planner, go to the “Setup” tab
- Click on “Flight Modes”
- Assign different modes to the positions on your radio’s mode switch
- Save your settings
For beginners, these modes are most important:
- Stabilize – helps you fly, but you control everything
- AltHold – keeps your altitude steady automatically
- Loiter – keeps position and altitude steady (for drones)
- RTL (Return to Launch) – comes back to the starting point automatically
Set Up Safety Features
ArduPilot has important safety features you should enable:
- Failsafe for radio loss – what to do if your remote stops working
- Failsafe for battery low – what to do if the battery gets too low
- Geofence – sets boundaries your vehicle won’t cross
These safety features can save your vehicle from crashes or fly-aways!
ArduPilot Flight Modes Explained
Manual
You control everything. No computer assistance.
Stabilize
Computer helps keep the vehicle level.
AltHold
Maintains altitude automatically.
Loiter
Maintains position and altitude.
RTL
Returns to launch point automatically.
Auto
Follows pre-programmed mission waypoints.
Guided
Go to points selected during flight.
Circle
Orbits around a point for photography.
Your First Flight (or Drive) 🚀
When you’re ready to test your vehicle for the first time:
- Go to an open area with plenty of space
- Do a pre-flight check of all connections and moving parts
- Position your vehicle in a safe starting orientation
- Arm the motors (usually by holding the throttle down and to the right)
- Start with very gentle controls
- Test each flight mode carefully
- Land or stop before the battery gets too low
Remember: it’s normal for things not to be perfect on the first try! Be patient and make small adjustments.
Understanding Mission Planner 🖥️
Mission Planner has several main screens that you’ll use:
The Flight Data Screen
This is where you’ll see:
- Your vehicle’s position on a map
- Important data like altitude, speed, and battery level
- Status messages and warnings
- Live video if you have a camera connected
The Flight Plan Screen
Here you can:
- Create automated missions by placing waypoints on a map
- Set actions for your vehicle to perform at each waypoint
- Save and load missions
- Upload missions to your vehicle
The Config/Tuning Screen
This screen lets you:
- Adjust how your vehicle flies or drives
- Fine-tune performance parameters
- Set up advanced features
- Analyze logs to improve performance
Tip: Don’t feel like you need to understand every single setting! Start with the basics and learn more as you go.
Making Your Vehicle Perform Better: Tuning 🔄
After your first few flights or drives, you might want to improve how your vehicle performs:
Basic PID Tuning
PID stands for Proportional, Integral, Derivative – these are settings that control how your vehicle moves:
- Start with the default PID values
- Make small changes (about 10-20% at a time)
- Test after each change
- Keep notes about what works and what doesn’t
For most people, the default values work pretty well, so don’t feel like you have to change them.
Using Auto Tune
For drones, ArduPilot has a great feature called Auto Tune:
- Fly your drone in AltHold mode and make sure it’s stable
- Switch to Auto Tune mode
- The drone will move back and forth to test different settings
- When finished, the new settings will be saved
Auto Tune can save you hours of manual adjustment!
Cool Projects You Can Do 🏆
Now that you have ArduPilot set up, what can you do with it? Here are some ideas:
Aerial Photography
Set up your drone with a camera and:
- Create orbit missions around interesting subjects
- Program waypoints for landscape shots
- Use survey grid patterns to map areas
Mapping and 3D Modeling
With the right software and a camera, you can:
- Create detailed maps of land areas
- Build 3D models of buildings or terrain
- Track changes in landscapes over time
Automated Delivery
For the more adventurous:
- Program waypoints between locations
- Add a simple delivery mechanism
- Create automated delivery routes
“Isn’t this too complicated for a beginner?”
Not at all! Start with simple projects and work your way up as you learn more.
When Things Go Wrong: Troubleshooting 🔍
Even with the best setup, sometimes things don’t work right. Here’s how to solve common problems:
Vehicle Won’t Arm
If your motors won’t start (arm):
- Check that your GPS has enough satellites (if GPS is required)
- Make sure the pre-arm checks are passing
- Verify that your radio is calibrated correctly
- Check that the safety switch (if you have one) is disabled
Unstable Flight
If your drone wobbles or is hard to control:
- Verify that the controller is mounted securely
- Check that the props are installed correctly and undamaged
- Make sure the center of gravity is balanced
- Consider re-calibrating your accelerometer
GPS Problems
If your GPS isn’t working well:
- Move away from buildings and trees
- Check the GPS antenna has a clear view of the sky
- Verify the GPS connections
- Wait longer for it to find satellites (sometimes it takes a few minutes)
Using Logs to Diagnose Problems
ArduPilot records detailed logs that can help you find problems:
- In Mission Planner, go to the “Flight Data” tab
- Click on “DataFlash Logs”
- Download logs from your controller
- Use Mission Planner’s log analysis tools to see what went wrong
Logs might look complicated, but even basic information like battery voltage and GPS positions can help you find problems.
Joining the ArduPilot Community 👪
One of the best things about ArduPilot is its amazing community. Here’s how to get involved:
Finding Help
When you need help, try these resources:
- The ArduPilot Forum (discuss.ardupilot.org)
- The ArduPilot Discord chat
- Facebook groups related to ArduPilot
- Local drone clubs and meetups
Giving Back
Once you’ve learned the basics, consider giving back:
- Help answer questions from new users
- Report bugs you find
- Contribute to the documentation
- If you know how to code, help improve the software
Many great features in ArduPilot came from regular users who wanted to make it better!
Keeping Your Setup Updated 🔄
ArduPilot gets better all the time with new updates:
- Check the ArduPilot website for news about updates
- Use Mission Planner to download and install new firmware
- Read the release notes to learn about new features
- Update gradually – don’t jump many versions at once
New updates often add features and fix bugs, but sometimes they can change how things work, so always read about the changes before updating.
Next Steps in Your ArduPilot Journey 🛣️
As you get more comfortable with ArduPilot, you can explore advanced features:
Camera Control
Trigger cameras or gimbals during flight
Terrain Following
Maintain a set height above changing terrain
Object Avoidance
Add sensors to avoid obstacles
Companion Computers
Add a small computer like Raspberry Pi for advanced functions
The possibilities with ArduPilot are endless!
Wrapping Up: Your ArduPilot Adventure Begins! 🎉
ArduPilot opens up a world of possibilities for vehicles of all types. Whether you’re just starting out or looking to build advanced autonomous systems, this open-source platform gives you the tools you need.
Remember these key points:
- Start small and build your knowledge step by step
- Don’t be afraid to ask the community for help
- Always prioritize safety in your projects
- Have fun and keep learning!
Now it’s your turn to explore what ArduPilot can do. What will you build first?